Must-Know Tips For Using Epoxy Resin And Wood!
Epoxy and wood go hand-in-hand! When you put the two of them together, you can get something really beautiful. Here’s how you can use them for your next creation!
Skill Level: Intermediate/Expert
Estimated Working Time: 48-72 Hours
What You’ll Need:
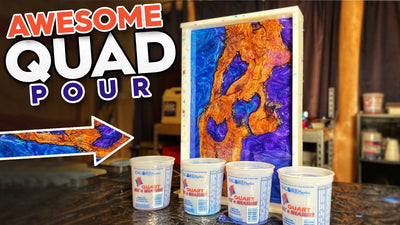
- Upstart Epoxy Deep Pour Resin (Optional)
- Upstart Epoxy Table Top Resin (Optional)
- Upstart Epoxy Powdered Pigments Set (Optional)
- Wood Slabs
- Sander
- Form/Mold
- Plywood (Optional)
- Tyvek Tape (Optional)
- Silicone
- Hot Glue
- Polyurethane
Work With Your Wood
Before you start working with your epoxy, you’ll want to prep your wood for success. If you’re using an older or more rustic piece of wood, you can get rid of any excess ashes that are stuck in the wood by sanding it. Paying extra attention to areas that have extensive burns, use your sander at about 80-grit.
This step is optional, but sanding off mill marks and bruises is very helpful. This ensures that the epoxy doesn’t have a hard time of adhering to the wood. It's a long process but it’s worth it!
Prepare The Form
Now, it’s time to place your slabs into a form to pour epoxy. If you can’t find a form that has your desired length and width, you can always make your own. We like to do this by constructing a form out of plywood and Tyvek tape.
If you’re using this method, a good rule of thumb is to make your form a bit longer than you intend the final project to be. That allows the epoxy room to move around as it cures. Don’t forget to screw the wood slabs together!
Seal the entire form on both sides with silicone to prevent leaks, and then use hot glue to hold the slabs down to the form. Do this by gluing it to the underside of the wood and sticking it into the form. If you don’t have hot glue, you can also weigh the slabs down with a heavyweight once your epoxy is poured.
Pour Your Epoxy
Now it’s time for the best part- adding in the epoxy. Measure the epoxy of your choice properly, add color if desired, and pour it into the form. Allow the epoxy to cure, and then flip the project upside down onto a soft surface. Sand down any residual drips and add a coat of polyurethane to seal it in. This will prevent the wood from moving and changing from humidity.
Clean Up The Piece
Seal all surfaces of the project to make sure that humidity doesn't get inside of it- this allows the wood to flex as normal. Use a slab jig router to plane off any excess epoxy, which will clean up your project, ensure that it will be level, and will rid you of any epoxy that might have gotten trapped in between the form and wood. You’re all done!